Monday, March 7, 2016

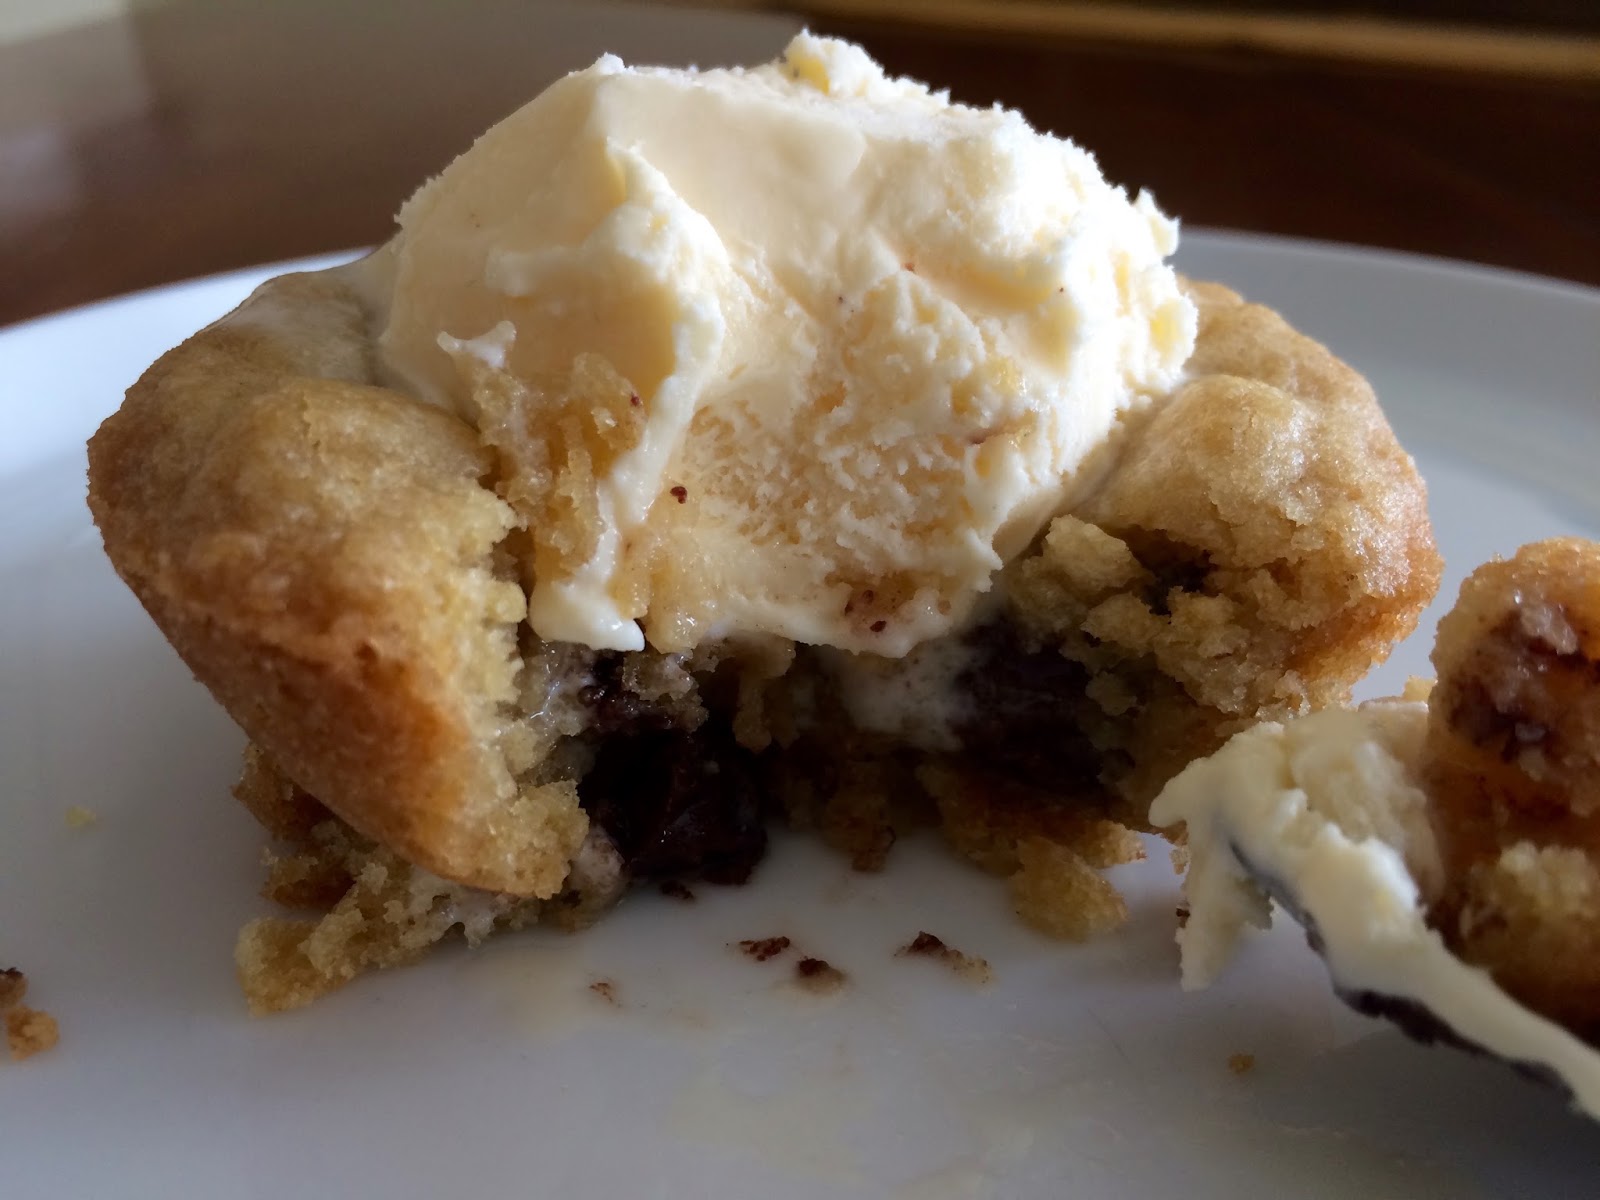
PAZOOKIE Cookie Cups


We are a cookie-loving-family so when I came across this recipe I got so excited!  Sometimes cookies can take a long time to bake, right?  Waiting for all the batches to be done can be pretty time consuming.  But when you want a cookie, you want a cookie!  And then you come to those moments in life when you want a cookie but you're tired of all the same cookie recipes you've been making time and time again.  You need a change, but not too much of a change.  So I introduce my new found love: a Pazookie!  I had never heard of a Pazookie but honestly it has changed my life.  I've made this recipe twice in the same week and will probably make it again later this week.  You can eat them by themselves (that's how my kid's prefer them) but oh my... they are delicious with a scoop of ice-cream on top when they are warm right out of the oven or even microwaved for a bit when you eat what's leftover (if you have any leftovers!).

I love these because they are soooooo delicious, and fun, and fast, and still taste like a cookie, and are a little change up from the every-day chocolate chip cookie.  I've halved the recipe before and they still turn out perfect (making about 10 Pazookie's).  My husband is a huge cookie batter lover.  Ever since my first pregnancy I haven't been able to get myself to eat raw dough, but Colby said this dough was deeeeeeelicious.  Even my boys were sneaking spoonfuls behind my back.

Now a little note... I tried making these as normal cookies and they spread out more than my liking so take my advice and keep them as a Pazookie!  Always!  And forever!  In your life!


See how they each have a little indent in the middle?  That's meant for a scoop of vanilla ice-cream!


Pazookie Cookie Cups
Yield: About 20 Cookie cups

Ingredients
2 1/4 cups all purpose flour
1 teaspoon baking soda
1 teaspoon salt
3/4 cup granulated sugar
3/4 cup brown sugar, packed
1 cup butter (2 sticks), at room temperature
2 teaspoons vanilla extract
2 eggs
1-2 cups chocolate chips (I've always just done 1)

Directions
Preheat oven to 350 degrees and coat muffin tins with non-stick cooking spray.  Apply liberally because no one wants their Pazookie's sticking to the pan!

In a medium-size bowl combine the flour, baking soda, salt and granulated sugar.  In a large bowl or the bowl of a standing mixer, beat the brown sugar, butter, vanilla and eggs.  Slowly add the dry ingredients to the butter mixture.  Beat for about 2 minutes until it's creamy.  Once combined and creamy stir in chocolate chips.

Put a spoonful of dough into each muffin tin.  You'll want to fill them 1/2-3/4 of the way full.  The Pazookie's will rise.  Bake for 11-13 minutes or until they are golden brown on top and a toothpick inserted into the center comes out clean.  Let them cool for about 3 minutes in the tin, then using another toothpick go around each Pazookie to separate it from the tin and remove them to a cooling rack.  Serve warm with a scoop of vanilla ice-cream.  

Source: www.smartschoolhouse.com    


Friday, March 4, 2016

Chicken Tortilla Soup


While I was in college a friend of mine gave me this recipe.  Goes to show that this recipe has too, passed the test of time.  It continues to be one of Colby's favorite dinners.  When I ask him what I should put on the menu for the next week or two this soup is always requested.  Winter time or Summer time, it doesn't seem to matter.  It's just that good.  


Chicken Tortilla Soup
Yield: 6 servings

Ingredients
2 tablespoons olive oil
1 onion (medium)
4 garlic cloves, minced
1 can black beans (drained and rinsed)
1 can diced tomatoes
6 cups chicken stock
2 or 3 raw chicken breasts
salt and pepper to taste
1/2 bunch cilantro, chopped

Toppings (optional): diced avocado, shredded cheese, sour cream, fresh lime juice,
fresh diced tomatoes, toasted tortilla pieces

Directions
Heat olive oil over medium heat.  Add onion and garlic and sauté until tender, about 3-5 minutes.  Add the black beans and diced tomatoes.  Continue cooking for several minutes to get rid of the canned taste (roughly 8-10 minutes).  Add the 6 cups of chicken stock and raw chicken breasts. Continue cooking for 15 minutes until chicken is cooked through.  Remove the chicken breasts, shred them, then add them back to the soup.  Add the chopped cilantro and salt and pepper to taste.  Place the soup in bowls and add any additional toppings you'd like.

Source:  My friend, Allison Knab


Wednesday, March 2, 2016

Salted Carmelitas


I don't know if I can even begin to tell you how much I love these magical, gooey, chocolate, caramel with the perfect hint of salt dessert bars.  If there is dessert served in heaven this has to be one of the options.  I don't think an afternoon goes by where I don't crave these Carmelitas.  Love chocolate?  Yes.  Love caramel?  Yes.  Love to try to eat healthy so when a dessert says it has oatmeal in it, it makes it all the more enticing?  Yes.  And then add that pinch of salt and man... this dessert is maybe just all around perfection.

These Carmelitas whip up in a snap.  They save me on those days when at 3pm I am craving something sweet but don't have a ton of time.  I make it, let it cool during dinner and once all the kids are in bed I bite into it and a smile instantly appears on my face.  Maybe because all the kids are in bed?  Or maybe because these bars are just that wonderful.  


Salted Carmelitas
Yield: About 12 bars

Ingredients
32 caramels, unwrapped (such as Kraft)
1/2 cup heavy cream
1 cup all-purpose flour
1 cup old-fashioned oats
3/4 cup packed light brown sugar
1/2 teaspoon baking soda
1/4 teaspoon table salt
10 tablespoons unsalted butter
1 teaspoon vanilla extract
3/4 cup chocolate chips
Flaky sea salt

1. Preheat the oven to 350 degrees.  Pour cream over caramels in a microwave safe bowl and microwave on high for 30 second intervals until the mixture is melted and smooth.  Stir well after each 30 second interval.  Set aside.

2. In a mixing bowl, whisk together flour, oats, brown sugar, baking soda and 1/4 teaspoon salt.  Set aside.  Place butter in a microwave safe bowl and heat in microwave until melted.  Stir vanilla into butter then pour over dry ingredients and stir well until evenly combined.  Press half of the oat mixture into a well greased 8x8-inch baking pan.  Bake in the preheated oven for 10 minutes.  Remove and sprinkle chocolate chips in an even layer onto the baked oatmeal crust, then pour caramel mixture evenly over the chocolate chips.  Lightly sprinkle sea salt over caramel layer (about 1/2 a teaspoon).  Sprinkle the remaining oatmeal mixture on top and bake for an additional 16 - 20 minutes until lightly golden brown.  Cool completely on a wire rack.  (To speed up the cooling process you can place it in the refrigerator.)  If you cut it before it's completely cooled it will be pretty gooey.  Some think this is wonderful where others may like it a little more set in place.  If that's the case - wait a few hours until it has completely cooled.

Source: adapted slightly from Cooking Classy.  She does 1/2 cup milk chocolate chips and 1/2 cup semi-sweet.  That's a little too much chocolate for me (I find 3/4 does it just right for us).  And I unfortunately don't have milk chocolate chips on hand very often so we go all out with semi-sweet.  

Tuesday, March 1, 2016

Pull-Apart Pizza and Homemade Pizza Sauce


My kids loooooove pizza.  We have made pizza probably almost 587 times.  We make it a lot.  I was so happy when I came across this recipe because it's made with whole wheat flour and it's a change from the normal, every-day pizza.  I may venture out to say we even prefer this pull-apart pizza over the norm.  It might look like there are a lot of steps to it, but it's really quite simple.  And it's really quite yummy.


Pull-Apart Pizza and Homemade Pizza Sauce
Yield: 4-6 servings

If you prefer to use all-purpose flour instead of wheat flour I'm sure it would still turn out great.  Or even half all-purpose, half whole wheat.  I've never tried it but I don't think it would change much, probably just the amount of total flour you add.  I love wheat flour so that's what we always use.  The possibilities for the filling in the middle are also endless.  You can add as much or as little toppings as you would like. (That's why I leave out an amount of pepperoni in the ingredients list.)

Ingredients
Pizza Dough
1 1/2 cups warm water
3/4 tablespoon instant yeast
2 tablespoons granulated sugar
2 tablespoons canola or vegetable oil
1 teaspoon salt
4 cups white whole wheat flour (approximately)

Pizza Sauce
2 (8 oz) cans tomato sauce
1/4 cup tomato paste
1 1/2 tablespoons olive oil
1 1/2 teaspoons honey
3/4 teaspoon dried oregano
3/4 teaspoon dried basil
1/4 teaspoon dried thyme
1 clove garlic, minced
salt and pepper to taste

Filling
3/4 cup pizza sauce
8 ounces mozzarella cheese
Pepperoni
1/3 cup finely shredded Parmesan cheese


Directions
For the dough:
1. In the bowl of a stand mixer combine the warm water, yeast, sugar, oil, salt and 2 cups of the flour. Begin mixing and continue to add the rest of the flour until the dough has pulled away from the sides of the bowl.  Judge the dough by how it feels and not by the exact flour amount.  You may need to add more or less.  The dough should be soft and smooth but still slightly tacky to the touch.  Wheat flour can become dense with too much so make sure to err on the lesser side because you can always add more while it's kneading.
2. Knead the dough in the mixer for about 7 minutes.  Lightly grease another bowl with cooking spray and place the dough in the bowl.  Cover with lightly greased plastic wrap and let the dough rise until doubled (about an hour).
3. Gently punch down the dough and press it onto a lightly greased counter to a 17x14- inch rectangle.
4. Spread the pizza sauce evenly across the top.  Don't go all the way to the edges or it will spill out when you roll it up.  Sprinkle with mozzarella cheese then layer on the pepperoni and sprinkle the Parmesan cheese on top.
5. Beginning with one of the long edges, roll the dough up cinnamon roll style.  Try to keep the roll as tight as you possibly can.  Pinch the sides as you roll along to keep sauce from spilling out.  Pinch the long seam to seal it up once it's all rolled together.
6. Carefully lift the roll and place it seam side down, diagonally, on a lined (parchment or silpat) baking sheet.  Cut a slice almost down to the bottom of the roll (careful not to cut all the way through!) every inch or so the length of the pizza roll. Gently pull the slices to alternating sides down the length leaving the bottom of the dough intact so the rolls don't completely separate.
7.  Preheat the oven to 400 degrees.  While the oven is preheating let the rolls rise, uncovered is fine, until slightly puffy.  I let them rise between 15-30 minutes.
8. Bake the pizza rolls for 18-22 minutes until they are golden on top and the bread is baked through.
9. Let the rolls rest for about 5 minutes before pulling apart.  The filling will be hot.  You can dip the rolls in extra, warmed pizza sauce if you'd like.

For the Pizza sauce:
Blend all ingredients in a blender until it's the consistency you like.  I do it for about 10 seconds.  Preferable let it rest about 30 minutes to allow all the flavors to marry together before putting it onto the rolled out pizza dough.  I like to make this in the morning and leave it in the fridge until I'm ready to make the pizza later that afternoon.  Store any leftover sauce in the refrigerator.

Source: Melskitchencafe.com and slightly adapted from cookingclassy.com