Friday, April 8, 2016

Banana Oat Greek Yogurt Muffins

I decided since my last post was a very sweet but not so healthy but incredibly delicious breakfast/snack recipe I should probably post a healthier breakfast/snack option for you healthy-conscious people.  Now these muffins aren't your normal muffins.  They are a little more on the dense side because they don't have flour or oil, but the ground up oats and greek yogurt still keep them soft and moist.  The chocolate chips kind of help balance out all the healthiness, but I'm sure you could substitute the chocolate for nuts or dried fruit if you'd prefer.  I prefer the chips because well, I need my daily chocolate fix, and combined with the other "good for you" ingredients I don't feel guilty about eating the chocolate chips!  And for a healthy muffin - these ones are some of the best I've come across so far.  (I just ate two while typing this up.)


Banana Oat Greek Yogurt Muffins
Yield: 12 muffins

Ingredients
1 cup plain Greek yogurt
2 medium ripe bananas, mashed
2 large eggs
2 cups rolled oats (quick or old fashioned)
1/4 cup brown sugar
1 1/2 teaspoons baking powder
1/2 teaspoon baking soda
1/2 cup chocolate chips, regular or mini

Directions
Preheat the oven to 400 degrees F.  Spray a muffin tin with non-stick cooking spray or line with paper liners and spray the liners with non-stick cooking spray.  (The lack of oil in this recipe might make the muffins stick to the liners.)  Set pan aside.

Add all the ingredients, except the chocolate chips, to a food processor or blender and process on high until the oats are broken down and the batter is smooth and creamy.  Stir in the chocolate chips.

Pour batter into prepared muffin pan, filling each cup 3/4 full.  You can sprinkle a few chocolate chips on top if you'd like.  If you do, press them lightly into the batter so they don't fall off when you take the muffins out of the oven.

Bake for 15-20 minutes, until the tops are set and a toothpick inserted into the middle comes out clean.  Allow to cool in pan for 10 minutes before removing.  Store in an air-tight container for up to a week.

Recipe Source: runningwithspoons.com


Wednesday, April 6, 2016

The. Best. Cinnamon Rolls. Ever!

So maybe in my last post I mentioned how I'm trying to eat healthier, and I really am like snacking on hard boiled eggs instead of Teddy Grahams and drinking protein powder every day and adding more good cards into my diet, but, well... I am still human and still have my weaknesses.  Sweets and chocolate are some of those weaknesses and these cinnamon rolls fall under that category but I don't feel guilty when I eat them.  I just feel happy.  I know there are thousands of cinnamon roll recipes in the world, but I have to tell you this is the best recipe I have come across so far.  

Now I cut this recipe in half to bring it down to 12 cinnamon rolls, but it doubles very nicely to make 24.  If I'm just making them for my family I leave it at 12 rolls.  These rolls are BIG!  But I really enjoy giving them away to friends so when I do that I double the batch. 

Another WONDERFUL thing about these babies (besides everything about them) is that they freeze SO nicely and still taste wonderful once you've warmed them up again.  So to freeze them: once they are completely cooled, transfer a single cinnamon roll to a quart-sized ziplock bag.  Seal the bag with as little air inside as possible and freeze them up to a month.  (They've never stayed in my freezer longer than a week!)  To reheat, remove the roll from the bag (they pop right out!) and warm them in the microwave for about 1 minute.


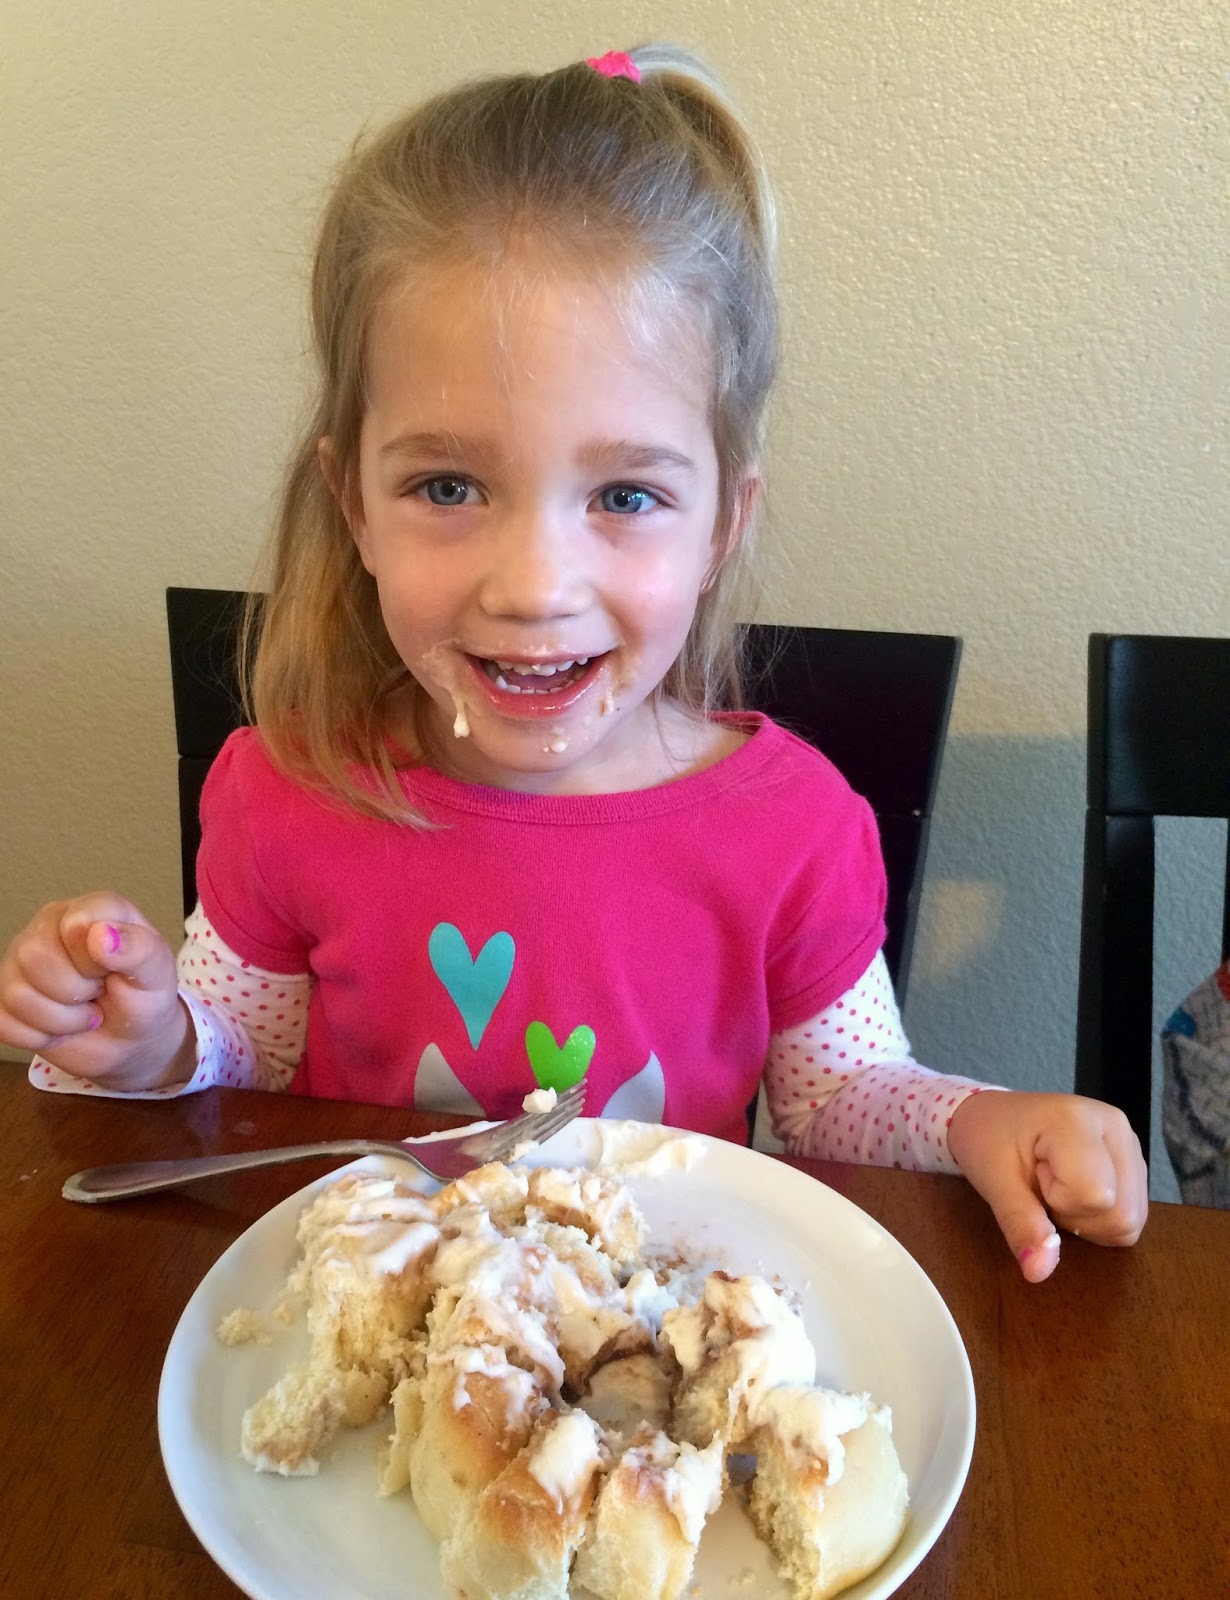
This girl can down these babies!


The Best Cinnamon Rolls.  Ever!
Yield: 12 cinnamon rolls

Ingredients
Rolls:
2 cups milk
1/2 cup butter
1/2 cup sugar
1 1/4 teaspoons salt
1 tablespoon instant yeast
2 large eggs
6-7 cups unbleached all-purpose flour
Filling:
4 tablespoons butter, softened
1 cup lightly packed brown sugar
1 tablespoon ground cinnamon
Frosting:
4 ounces cream cheese, softened
4 tablespoons butter, softened
1/2 teaspoon vanilla
1 teaspoon maple extract/flavoring
Pinch of salt
1 pound powdered sugar
Milk for consistency

Directions
For the dough, heat the milk in a saucepan until the milk is scalded (right before it simmers - it will start steaming and little bubbles will form around the side of the pan).  Pour the milk into the bowl of an electric mixer with the dough hook attached.

Add butter, sugar and salt and mix until the butter is melted.  Let the mixture cool until warm but not hot.  Add the yeast and eggs and gradually add the flour until the dough clears the sides of the bowl.  The dough should be soft and just slightly sticky without leaving a lot of residue on your fingers.  Knead for 3-4 minutes.  Transfer the dough to a large, lightly greased bowl and cover with lightly greased plastic wrap until it has doubled in size.

Roll the dough into an 18x12-inch rectangle.  (It's soft enough you don't need a rolling pin.  You can do it by hand.  I love it!)  Spread the softened 4 tablespoons of butter over the dough.  Combine the brown sugar and cinnamon and sprinkle on top.  Gently pat it with your hands.  Starting with one long end, roll up the cinnamon rolls as tightly as possible.  With a serrated knife, cut the cinnamon roll in half.  Then cut each half in half again (forming four equal portions).  Then cut each of the four portions into three rolls making 12 rolls total.  Place the rolls evenly spaced on a silpat lined or sprayed with non-stick spray large, rimmed baking sheet.  Cover the pan with lightly greased plastic wrap and let the rolls rise until double.

Preheat the oven to 350 degrees F.  Bake the rolls for about 18-22 minutes until only slightly golden on top.  Let the rolls cool almost completely in the pan before frosting.  This helps the frosting stay in place and not melt all over.

For the frosting, in a large bowl, whip together the cream cheese and butter.  Add the vanilla, maple and salt and mix until combined.  Gradually add the powdered sugar and mix until thick and creamy.  Add milk a little at a time until the frosting is smooth and at the consistency you like.  Spread on top of the cinnamon rolls.

*Note:  I've made these with a cheaper Maple Extract and they just didn't taste as good.  My favorite Maple Extract is this one.  It might be a little pricier but it is so worth it.  I use it for my Maple Syrup recipe as well.

Recipe Source: adapted slightly from melskitchencafe.com.

Monday, April 4, 2016

Skillet Chicken Gyros with Yogurt-Cucumber Sauce


So I've started becoming a little more serious about my running these last few weeks.  Ever since October 31st of last year I've run two 5K's and one 10-mile race.  It's nothing amazing but it's given me goals to work towards.  Last week I signed up for my first 10K for the end of April.  With picking up my running and trying to do better I've started paying more attention to what kinds of food I'm eating, trying to fuel my body with more of the good things it needs.  After all... without a healthy body I can't do this hobby that I'm starting to fall in love with.  Last week I bought this cookbook on Amazon.  I've never loved a cookbook as much as I love this one, and I've only had it for one week!  This is where I found this super yummy, fast and easy recipe!  It's good for your body and good for your tastebuds!  I loved the yogurt-cucumber sauce, and it's so easy to make.  I'm pretty sure I'll be making this recipe many times these upcoming hot Summer months.


Skillet Chicken Gyros with Yogurt-Cucumber Sauce
Yield: 4 servings

Ingredients
4 boneless, skinless chicken breast halves
2 teaspoons extra-virgin olive oil
1/2 teaspoon dried oregano
1/4 teaspoon salt
1/8 teaspoon ground black pepper
1/2 cup plain Greek yogurt
1/2 cucumber, peeled, seeded and chopped
1 small clove garlic, minced
4 large whole wheat pitas
1 cup chopped lettuce (of your choice) or spinach
1/2 tomato, chopped
1/4 cup crumbled feta cheese

Directions
Coat a large skillet with non-stick cooking spray and heat over medium-high heat.

In a bowl, combine the chicken, oil, oregano, salt and pepper.  Cook the chicken for 5 to 6 minutes per side, or until the thickest portion of the chicken reaches an internal temperature of 165 degrees and the juices run clear.  Transfer to a cutting board and cut into thin slices.

Meanwhile, in a small bowl, combine the yogurt, cucumber and garlic.  With the tip of a knife, cut an opening in one side of each pita.

Fill each pita with one-fourth of the lettuce (of your choice), tomato, feta and chicken.  Spoon the yogurt-cucumber sauce over the chicken.

Recipe Source: Golub, Joanna, Sayaho.  Runner's World: Meals on the Run, 150 energy-packed recipes in 30 minutes or less. Rodale, 2015.

Friday, April 1, 2016

French Bread


Our family loves this bread recipe.  It's been on our menu monthly for years and it has never disappointed.  (Except for the one time I forgot to add salt.  Don't forget to add the salt!)  It's a very easy recipe and goes along with so many different meals.  It can also be used for homemade garlic bread, french toast, bread crumbs or really a myriad of other things!  Or if you're my daughter you just ask for slice after slice after slice for lunch and call that mealtime good.  I hope you enjoy it!


French Bread
Yield: 2 loaves

Ingredients
2 1/4 cups warm water
2 tablespoons sugar
1 tablespoon yeast
1 tablespoon salt
2 tablespoons oil
5 1/2 - 6 cups all purpose flour

Directions
In a large mixing bowl fitted with the dough hook, combine the water, sugar and yeast.  If using active dry yeast, let the mixture bubble and foam before proceeding (takes about 5 minutes).  If using instant yeast, proceed with the recipe (no need to let the yeast activate).  Add the salt, oil and 3 cups of flour and mix.  Gradually add in 2 1/2 to 3 more cups of flour.  The dough should clean off the sides of the bowl and not be too sticky but should still be soft.  Knead for 2-3 minutes until the dough is smooth and soft.

Leave the dough in the mixer to rest for 10 minutes and then stir it down (turn on your mixer for 10 seconds) and then allow to rest another 10 minutes.  Repeat for a total of 5 times then put the dough onto a lightly greased surface and divide into two equal parts.  Roll each part into a 9x13 rectangle.  Roll the dough up starting for the long side and pinch the seam to seal (like with cinnamon rolls).  Arrange seam side down on a large baking stone or greased baking sheet.  Repeat with the second part of dough.  Cover both loaves with greased plastic wrap and let them rise until doubled in size.  If you'd like - with a very sharp knife cut 3 or 4 gashes at an angle on the top of each loaf.  Bake at 375 degrees for 25-30 minutes until golden brown and baked through.  Allow to cool completely on cooling racks.

Recipe Source: melskitchencafe.com